Installation & Activation #
This guide walks you through downloading, installing, and activating PetMatchPro on your WordPress website.
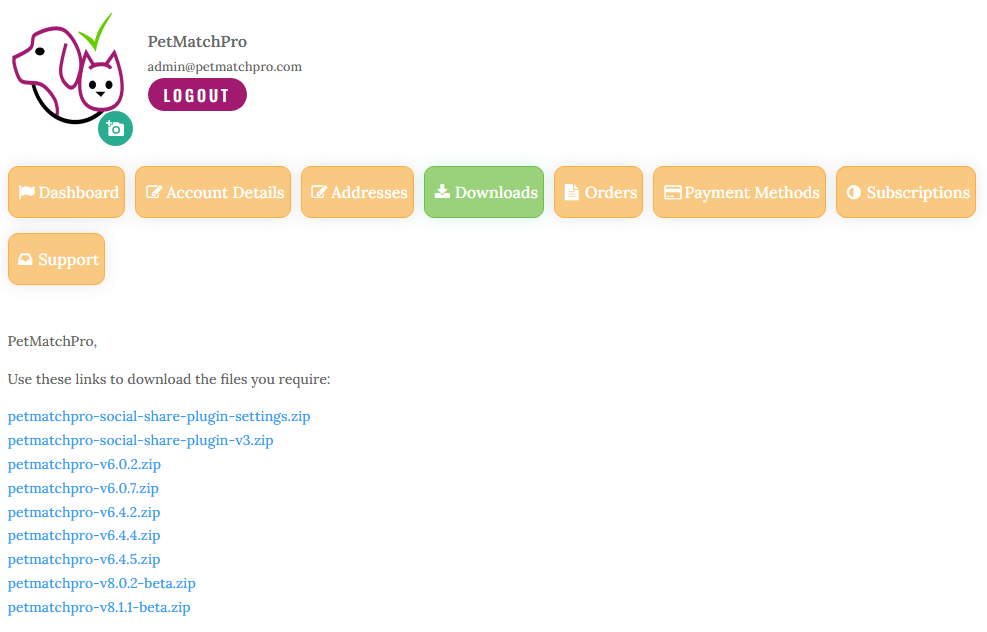
Download the Plugin #
- Log in to your PetMatchPro account at petmatchpro.com/my-account.
- Select the Downloads tab.
- Click the link for the latest version of the
petmatchpro-vx.y.z.zipfile.
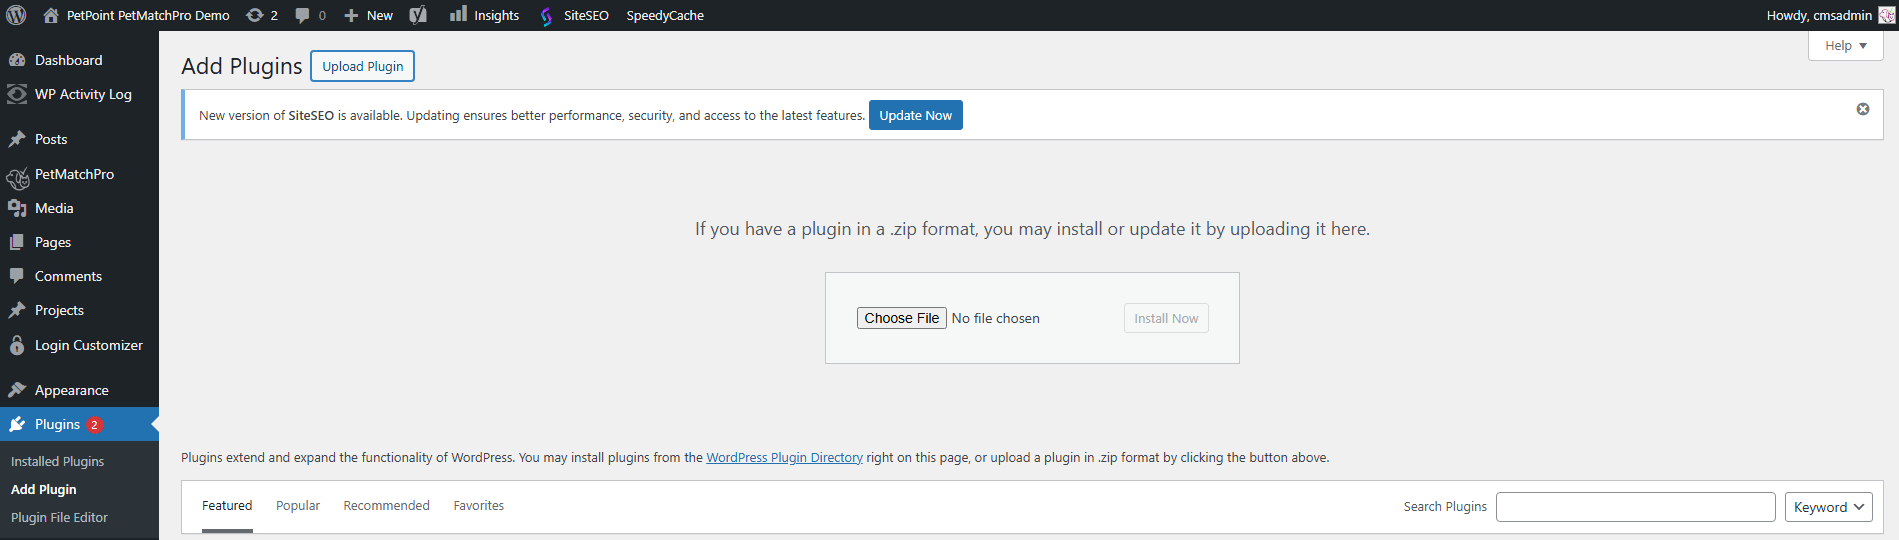
Install the Plugin #
- Log in to your WordPress admin dashboard.
- Go to Plugins > Add New.
- Click Upload Plugin at the top of the page.
- Click Choose File and select the
petmatchpro-vx.y.z.zipfile you downloaded. - Click Install Now.
- Once the upload completes, click Activate Plugin.
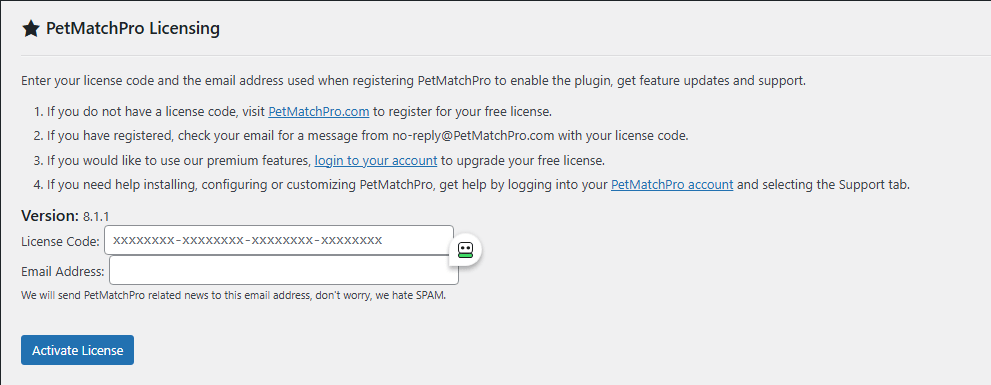
Activate Your License #
- In your WordPress admin menu, navigate to PetMatchPro > License Information.
- Enter the License Code you received via email after purchasing your subscription.
- Enter the email address you used when registering.
- Click the Activate button.
Your license tier determines which features are available. PetMatchPro offers three tiers:
| Tier | Features |
|---|---|
| Basic | Core adoption search and detail pages, default templates |
| Junior | Adds lost/found search, premium templates, overlays, icons, pagination, analytics |
| Preferred | All features including preferred listings, filter value management, custom field configuration |
For a full comparison, see Understanding License Tiers.
After Activation #
Once activated, PetMatchPro will launch the Setup Wizard to guide you through initial configuration. The wizard walks you through connecting your shelter management system, choosing templates, and creating your first pages.
If you prefer to skip the wizard, you can configure everything manually through the PetMatchPro admin settings tabs.
Next Steps #
- Setup Wizard Walkthrough — Complete the guided setup
- Connecting Your Shelter System — Set up your API connection
- Understanding License Tiers — Compare what each tier includes
Activate Your License
ultima modifica: 2026-03-24T11:15:32-04:00
da


