Setup Wizard Walkthrough #
The PetMatchPro Setup Wizard guides you through configuring the plugin in 13 steps. It launches automatically after activation, or you can restart it from the PetMatchPro admin settings.
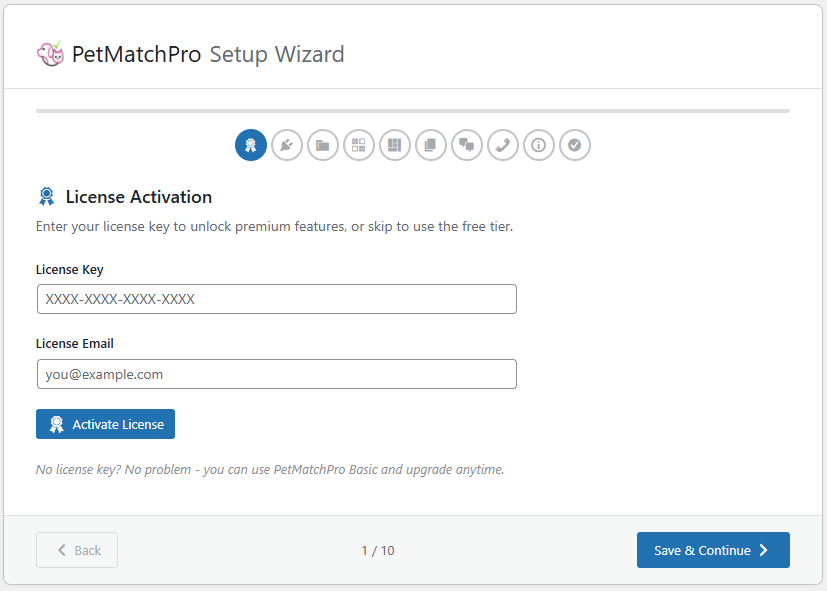
Step 1: License Activation #
Enter your license key and registration email to activate your subscription. If you don’t have a license yet, you can skip this step to use the Basic (free) tier.
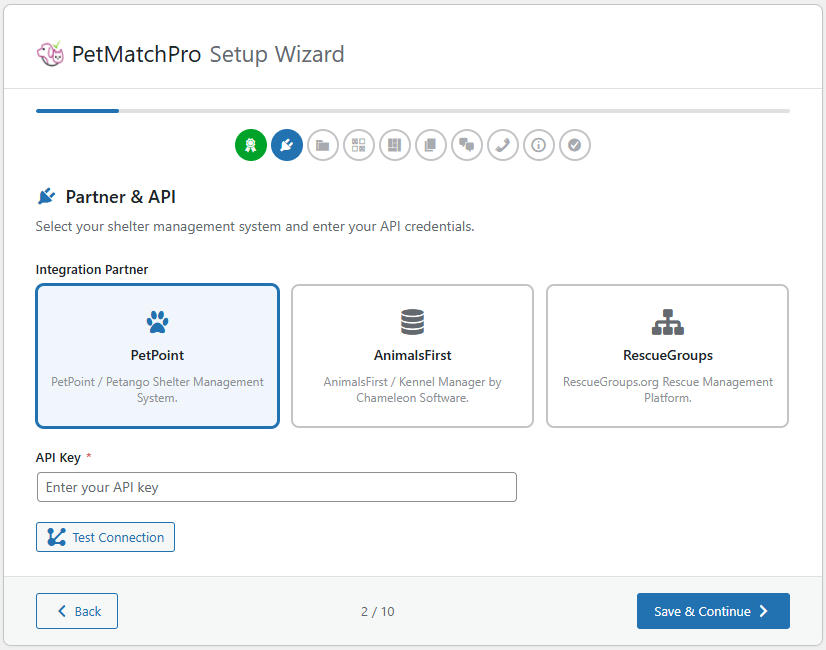
Step 2: Partner & API #
Select your shelter management system and enter your API credentials:
- PetPoint — Enter your API key
- AnimalsFirst — Enter your API key (and optionally select an API source)
- RescueGroups — Enter your API key and Organization ID
Step 3: Method Types #
Choose which search types to enable for your site. Available methods depend on your partner and license tier:
| Method | Description | Availability |
|---|---|---|
| Adopt | Adoptable animals | All tiers, all partners |
| Lost | Lost animal reports | Junior+, PetPoint & AnimalsFirst |
| Found | Found animal reports | Junior+, PetPoint & AnimalsFirst |
| List | General animal list | Junior+, PetPoint only |
| Preferred | Featured/priority animals | Preferred tier, AnimalsFirst only |
| Featured | Featured carousel/display | Junior+, PetPoint & AnimalsFirst |
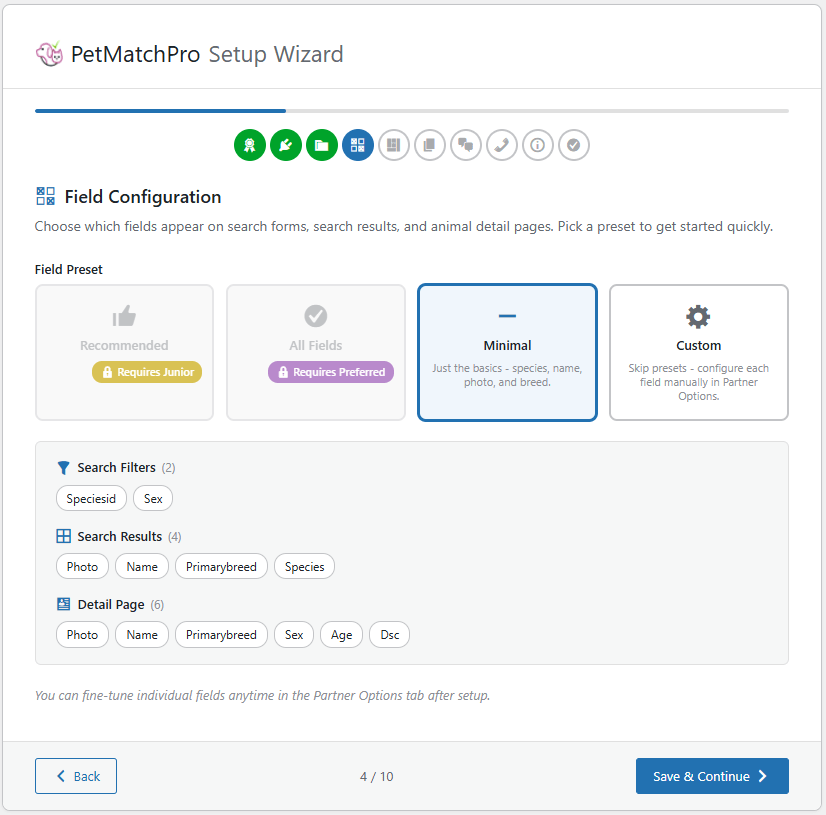
Step 4: Field Configuration #
Select which animal data fields to display in your search results and detail pages. Choose from preset field groups or customize your selection.
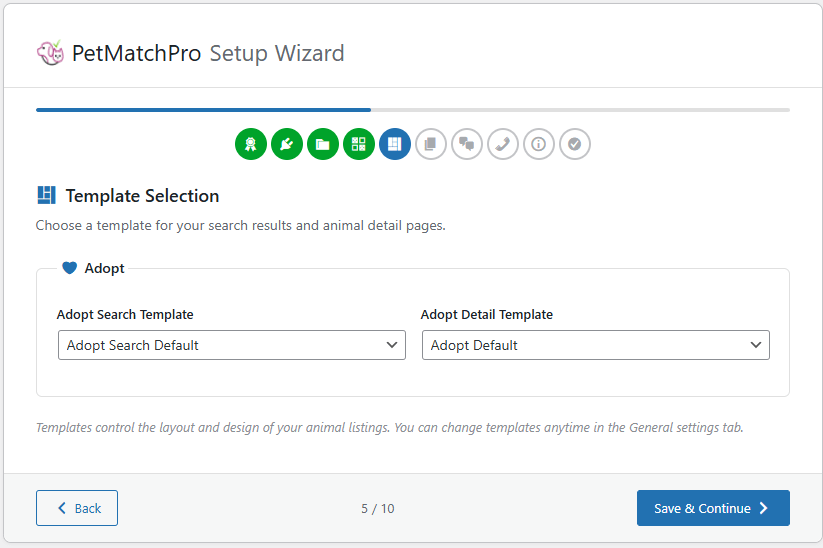
Step 5: Template Selection #
Choose a search template and detail template for each enabled method type. The Basic tier includes default templates. Junior and Preferred tiers unlock additional layouts.
Step 6: Page Creation #
The wizard can automatically create WordPress pages with the correct shortcodes for your search and detail pages. You can also create pages manually later.
Step 7: Messages #
Configure user-facing messages such as the “no results found” text that displays when a search returns no animals.
Step 8: Contact Info #
Enter your organization’s support email and contact information. This is used for the support link shown in error messages (when configured).
Step 9: Performance #
Requires Junior license or higher. Configure API caching to improve page load times. Set cache duration (TTL) for search results and detail pages.
Step 10: Analytics & SEO #
Requires Preferred license. Set up Google Analytics event tracking, SEO settings, JSON-LD structured data, and sitemap configuration.
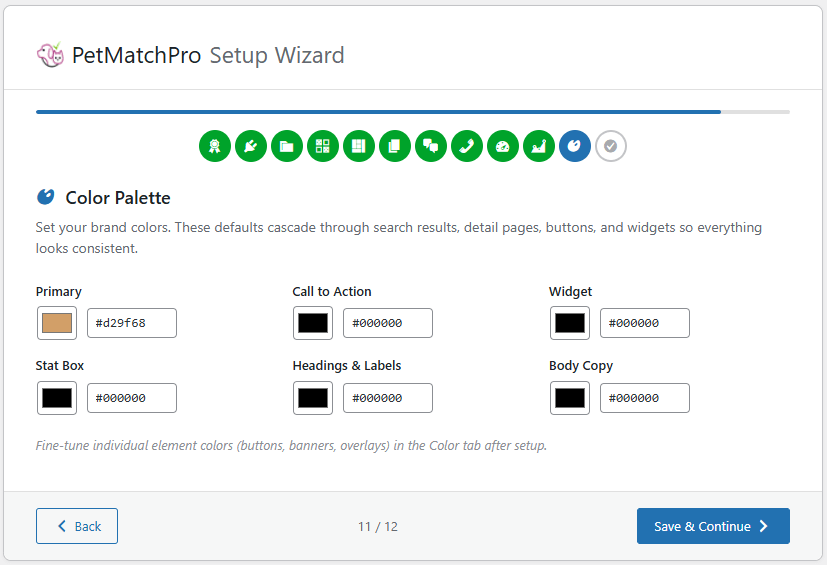
Step 11: Color Palette #
The Colors tab is available to all license tiers, so every site can apply some level of brand customization. Individual color settings within the tab are gated by license: the Basic tier exposes a core set of color options, while Junior and Preferred tiers unlock additional controls for buttons, icons, overlays, and other UI elements. Settings above your tier appear disabled with an upgrade prompt.
Step 12: License Summary #
Displayed for Basic (free) tier users only. Shows a summary of your current license and what features are available at higher tiers.
Step 13: Summary #
Review all your configuration choices. Click Complete to save your settings and finish the wizard.

Tips #
- You can go back to any previous step using the step navigation at the top.
- All settings configured in the wizard can be changed later in the PetMatchPro admin tabs.
- If you’re unsure about a setting, use the default value — you can always adjust it later.
Next Steps #
- Connecting Your Shelter System — Detailed API setup for each partner
- Creating Your First Search Page — Get your search page live


