Dynamic Banners #
Dynamic Banners let you drive the banner text on search-result cards – and an optional per-value color – from animal fields instead of a single static message. Instead of every card showing the same banner, you map the values of one or more source fields to display labels, so each card shows the banner that matches that animal’s data.
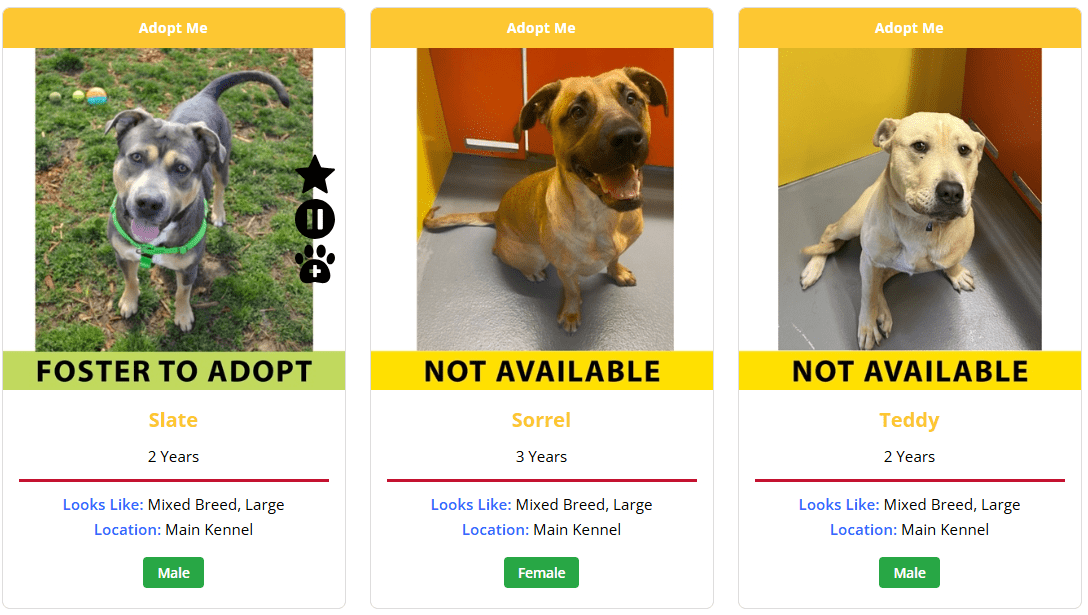
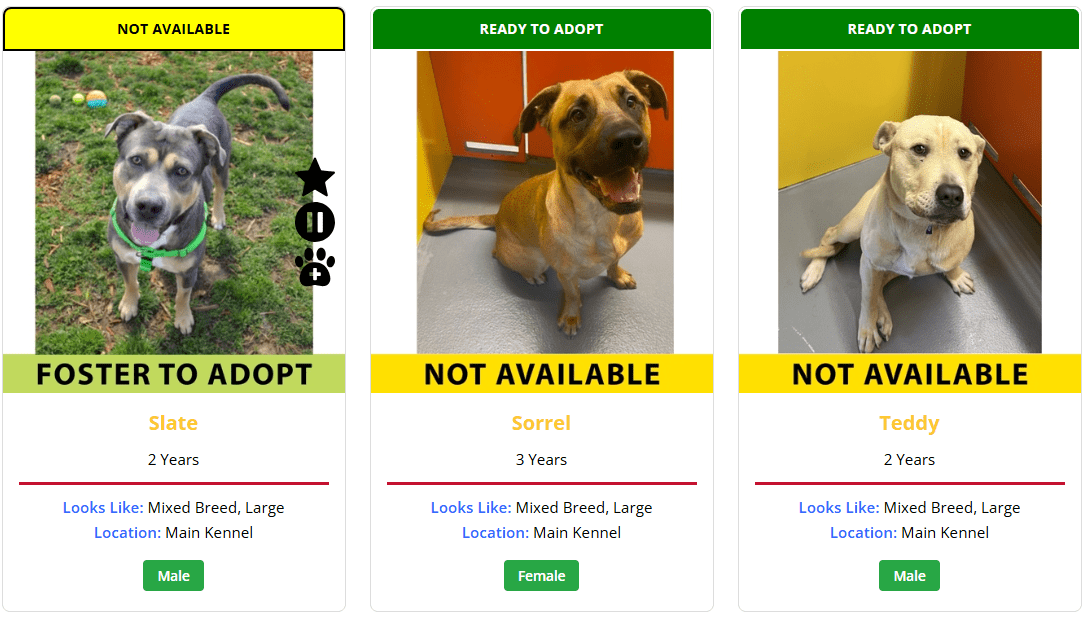
The classic example: an animal that is on hold should shout On Hold in red, while every other animal invites visitors with a friendly green Adopt Me. With Dynamic Banners you configure that once and PetMatchPro applies the correct banner to each card automatically.
New in 8.18.0: banners are now driven by an ordered cascade of priority levels. Each level has its own source field and its own value rows, and the levels are checked in order until one matches. That lets you layer rules – for example, On Hold first, then Special Needs, then Senior, and finally a default Adopt Me – so the most important status always wins. See Priority Levels below.
 |
 |
Requires Junior license. Both the admin toggle and the dynamic_banner shortcode override are Junior-gated. This release applies dynamic banners to search-result cards only – detail-page banners are a planned phase 2.
Enabling Dynamic Banners #
Dynamic Banners are configured under PetMatchPro Options > Banners – a dedicated admin tab. Settings are per method type (adopt, lost, found, list, preferred – depending on which methods your partner supports), so you can run a different banner scheme for adoptable animals than for lost or found reports.
- Go to the PetMatchPro Options > Banners tab.
- Choose the method type you want to configure (for example, adopt).
- Turn on the Enable toggle for that method type.
- Click Add Level to create a priority level (your first level is Level 1).
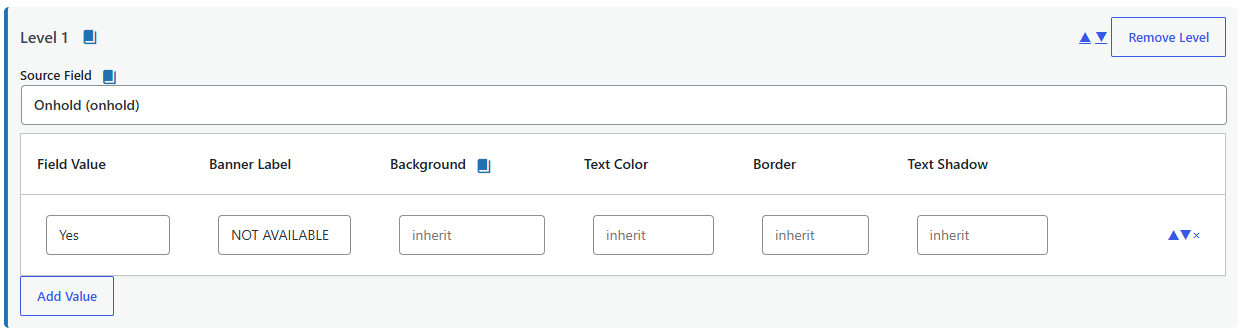
- Pick a Source Field for that level (see below).
- Add one or more Value → Label rows to the level with the Add Value button.
- Add more levels as needed and order them with the up/down controls – the top level has the highest priority.
- Optionally set the single Default / Fallback label for animals that match no level.
- Click Save.
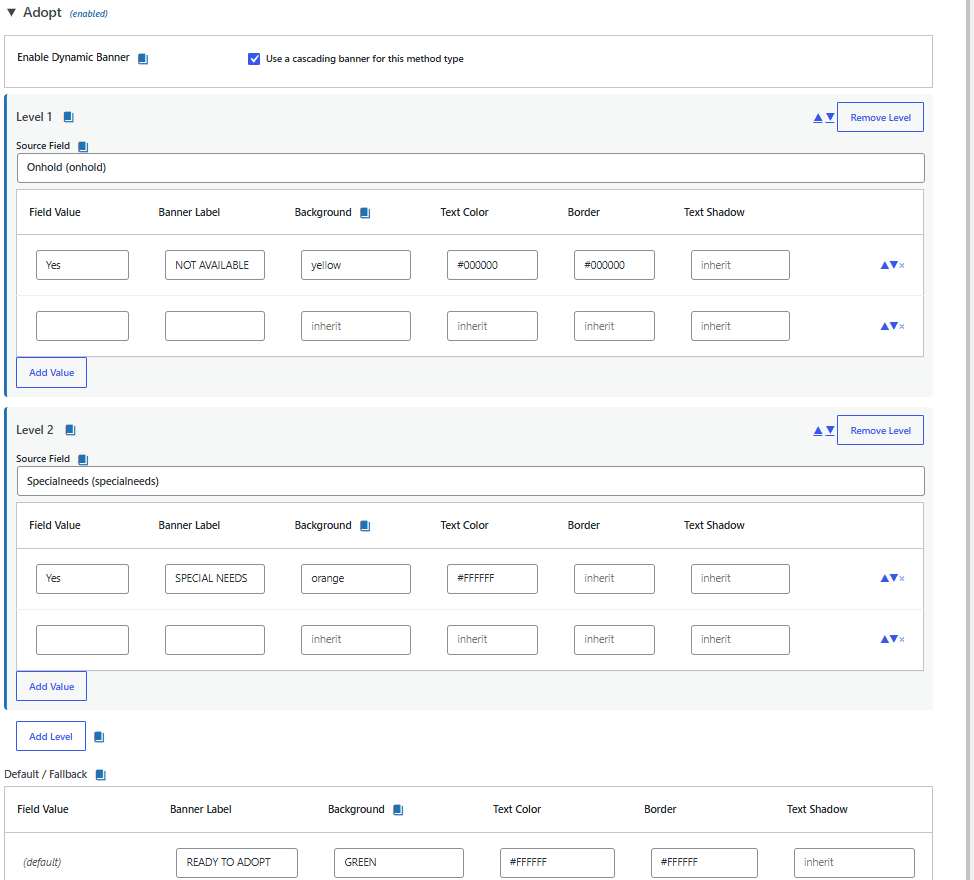
Priority Levels (Cascade) #
Each method type is configured as an ordered list of priority levels. A level is a self-contained rule: it has its own Source Field and its own set of Value → Label rows. PetMatchPro walks the levels from top to bottom and the first level that matches wins.
The key behavior is fall-through: if a level’s source field has a value but that value matches none of the level’s rows, evaluation continues to the next level – it does not jump straight to the default. Only when every level has been checked with no match does the single Default / Fallback row apply.
A worked three-level example for adoptable animals:
| Priority | Source field | Value → Label | Color |
|---|---|---|---|
| Level 1 | onhold |
Yes → On Hold |
Red |
| Level 2 | special_needs |
Yes → Special Needs |
Blue |
| Level 3 | age_group |
Senior → Senior |
Amber |
| Default | – | Adopt Me | Green |
With this configuration, an animal that is on hold shows On Hold even if it is also a senior, because Level 1 wins. A senior animal that is not on hold and has no special needs falls through Levels 1 and 2 and shows Senior. An animal that matches none of the three levels shows Adopt Me.
Ordering, adding, and removing levels #
- Add Level appends a new, empty level. Add Value adds a row within a level.
- The up/down controls on each level and each row change priority – no retyping required. Saving stores the levels in the exact order shown.
- Remove Level and the row remove control delete that level or row. Empty rows and empty levels are dropped automatically when you save.
Recommended maximums: up to 10 levels per method type and 25 values per level. These are soft guidelines, not hard limits – the admin shows an advisory note if you exceed them but never blocks saving. They exist to keep the configuration and the generated CSS manageable.
Choosing a Source Field #
The Source Field is the animal field whose value decides whether a level matches. Each level picks its own source field. The available source fields depend on your integration partner:
| Partner | Source field(s) |
|---|---|
| PetPoint | onhold (also stage / stageid and other status-icon fields) |
| AnimalsFirst | status |
| RescueGroups | animalstatus |
For the On Hold / Adopt Me example, the PetPoint onhold field is the source: when it reads Yes the animal is on hold, otherwise it is available.
Building Value to Label Rows #
Each row maps one source-field value to the banner label that should display when an animal has that value. Rows are repeatable – add as many as you need.
For the worked example, with onhold as the source field you would add a single row:
| Value | Label |
|---|---|
Yes |
On Hold |
Animals whose onhold value is Yes get the On Hold banner. Everything else falls through to the default / fallback row (see below), which you would set to Adopt Me.
Per-Value Colors #
Each Value → Label row has optional background, text, and border color fields. Use them to give a value its own look – a red On Hold banner and a green Adopt Me banner, for instance.
- Leave a color field blank to inherit the default. A blank color falls back to the banner colors configured on the Colors tab. The Colors tab is now the default banner look.
- Fill a color field to override. A per-value color wins over the Colors-tab default by CSS specificity – no
!importantis used. The banner color CSS is container-scoped, with a per-value class of.pmp-banner-val-{slug}. As of 8.18.0 the slug is namespaced by method type and level (for exampleadopt-l0-on-hold), so the same value used on two different levels can carry two distinct colors without colliding. These class names are internal and regenerate automatically on save.
Because per-value overrides win by specificity rather than !important, you can still layer your own theme CSS on top using a more specific selector. See Styling Conflicts if a theme rule is fighting your banner colors.
Default / Fallback Row #
The Default / Fallback row sets the banner label (and optional colors) for any animal whose source-field value does not match a configured Value → Label row. In the worked example this is where you put Adopt Me in green.
One important rule:
- An empty default label renders no banner at all for unmatched values. PetMatchPro does not draw an empty box – the card simply has no banner. Use this when you only want a banner on specific values (for example, show On Hold only on held animals and nothing on the rest).
How Matching Works #
Matching is straightforward and predictable:
- Within a level: exact match, case-insensitive. The animal’s source-field value is compared to each row’s value ignoring letter case. There is no “contains”, multi-value, or regular-expression matching. The first row whose value matches is used.
- Across levels: the first level that produces a match wins. A level whose field has a value that matches none of its rows falls through to the next level rather than stopping at the default.
- No match falls back to the default. Only after every level is checked with no match is the single Default / Fallback label used – and if that label is empty, no banner renders.
License Requirements #
Dynamic Banners require a Junior license or higher. On the Basic tier the Banners admin section and the dynamic_banner shortcode override are not available. Junior and Preferred sites get the full feature.
The static banner= shortcode parameter still takes priority over dynamic banners for back-compatibility: if a shortcode sets banner="...", that static text is shown on every card and no per-value color class is applied. Dynamic banners only kick in when no static banner= is present.
Next Steps #
- Color Customization – Set the default banner look that per-value colors inherit from
- Using Banners and Subtitles Effectively – Best practices for banner messaging
- [pmp-search] Reference – The
dynamic_bannershortcode override - Styling Conflicts – Resolve theme CSS that overrides banner colors


